Getting Started With The Papilio RetroCade Synth
After work I took a trip to the postal depot to hand some more import duty over to "the man" for my clearly labelled review samples. But I didn't mind. I walked another mile and a bit to pick up cash because they don't take credit cards. But I didn't mind. The reason I didn't mind is because the parcel I was collecting came from GadgetFactory, the guys behind the awe-inspiring Papilio.
I've been waiting for a Papilio One to turn up for a little while now, and I'm not kidding when I say it's one of my most anticipated samples ever. Unlike pretty much everything else I've tested it's not a tablet computer, or a high-end speaker, or a great video-game, not at all, it's a little slice of potential.
The potential of the Papilio comes from its many, many guises. You see the FPGA, or Field Programmable Gate Array, at the heart of this magical little board can be reconfigured to reproduce a variety of actual hardware configurations; one of these is an Arduino-on-steroids; ZPUino, but that's just the tip of the ice-berg.
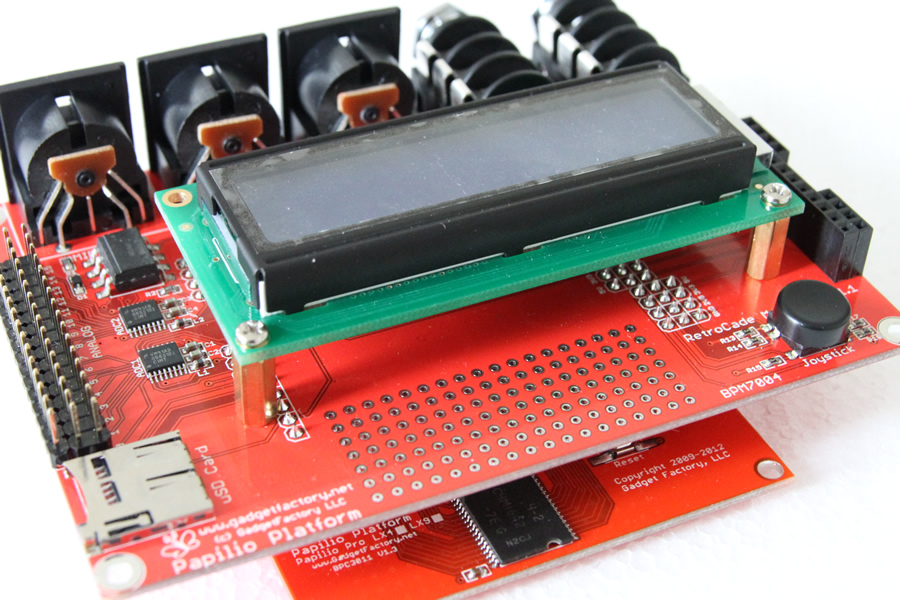
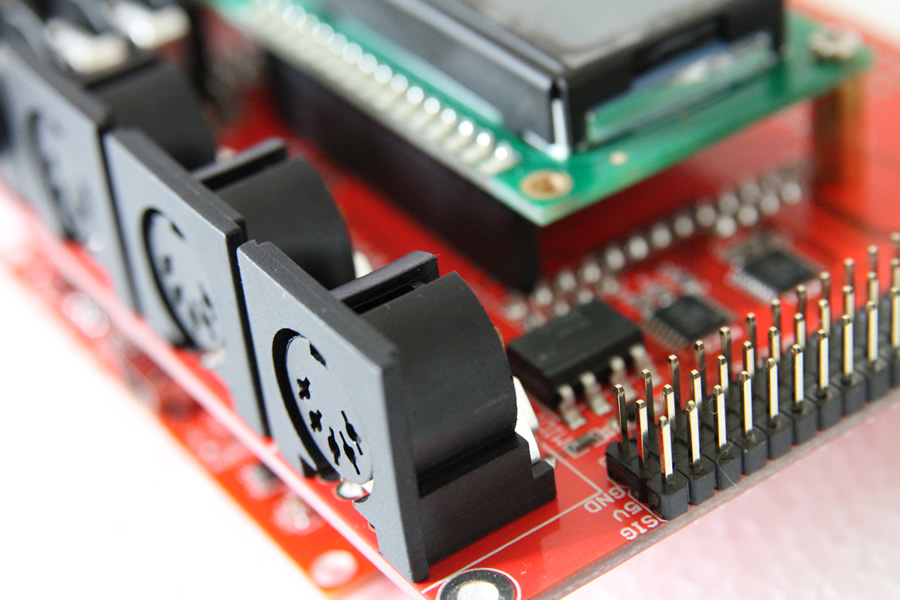
My first foray into the Papilio has come in the form of the RetroCade Arcade Synth which came already plugged onto the Papilio Pro board and looked simply so enticing that I couldn't help but give it a try. A couple of hours of tinkering later, and I was up and running. "Tinkering?" I hear you say. No, this isn't a bad thing; tinkering with the RetroCade was a gentle introduction to just how flexible it can be, and has given me inspiration for my own future changes.
Windows "Hate"
Before even getting the RetroCade sofware installed I had to juggle with Windows 8 so that the drivers would install. Now I don't dislike Windows 8, but it was a chore booting into the UEFI Firmware Settings to disable "Secure Boot" so that I could follow the guide to getting everything set up.
The drivers come in the RetroCade installer package, but at time of writing it was last updated about 3 months ago and I needed to grab several updated components separately. These were the Papilio Loader GUI and the latest RetroCade Synth bit file.
The next hurdle was actually getting everything working as expected. My setup involved the Papilio Pro with RetroCade attached, hooked up to a USB to MIDI adaptor. I then connected a 61-key USB controller and used the RetroCade desktop software to route my keyboard through to the RetroCade's input. This worked a treat, except that pressing any key would result in an indefinite sustain; not good!
The fix for my particular problem, a slightly mad feature of MIDI where NoteOff messages can instead be NoteOn messages with a velocity of 0, could be found on the RetroCade forum and this is where things got interesting...
Tweaking The Software
The beauty of the RetroCade is not that is incorporates an FPGA clone of the legendary Commodore 64 SID and Yamaha YN-2169 chip, but that both these hardware implementations, and the Arduino-like Sketch used to drive them are completely open and user-editable.
Fixing the RetroCade to support my perculiar keyboard was a simple case of loading the modified Arduino IDE, pasting in some fixes from the forums, tweaking appropriately, and saving.
This has given me a taste for synthesizer hacking, and I'd love to try my hand at adding some live-performance functionality like keyboard splits and fast patch/channel changing.
Playing with the RetroCade was a nice, Friday-friendly introduction to Papilio and once everything was up and running it was really a joy to play. The synthesizer is alarmingly powerful, and exudes nostalgia, but the software has both room for improvement and the opportunity for any user to delve in and make those improvements.
« Back to index Posted on 2013-04-06 by Philip Howard